3 minutes
How to run Clearpass on Proxmox
I recently upgraded my homelab hardware, so I decided to install a local ClearPass VM for NAC labs.
💡 This does require a trial license from HPE.
First, download the KVM raw image from HPE networking support site.
Unpack the files and browse to the raw disk file. You will later upload this
file to proxmox.
Set up the VM
Check the link for specs:
https://arubanetworking.hpe.com/techdocs/ClearPass/6.11/Installation-Guide/Default.htm
Other guides and docs can be found here:
https://airheads.hpe.com/discussion/clearpass-docs-configuration-integration-guides-solution-guides-release-notes-user-guides
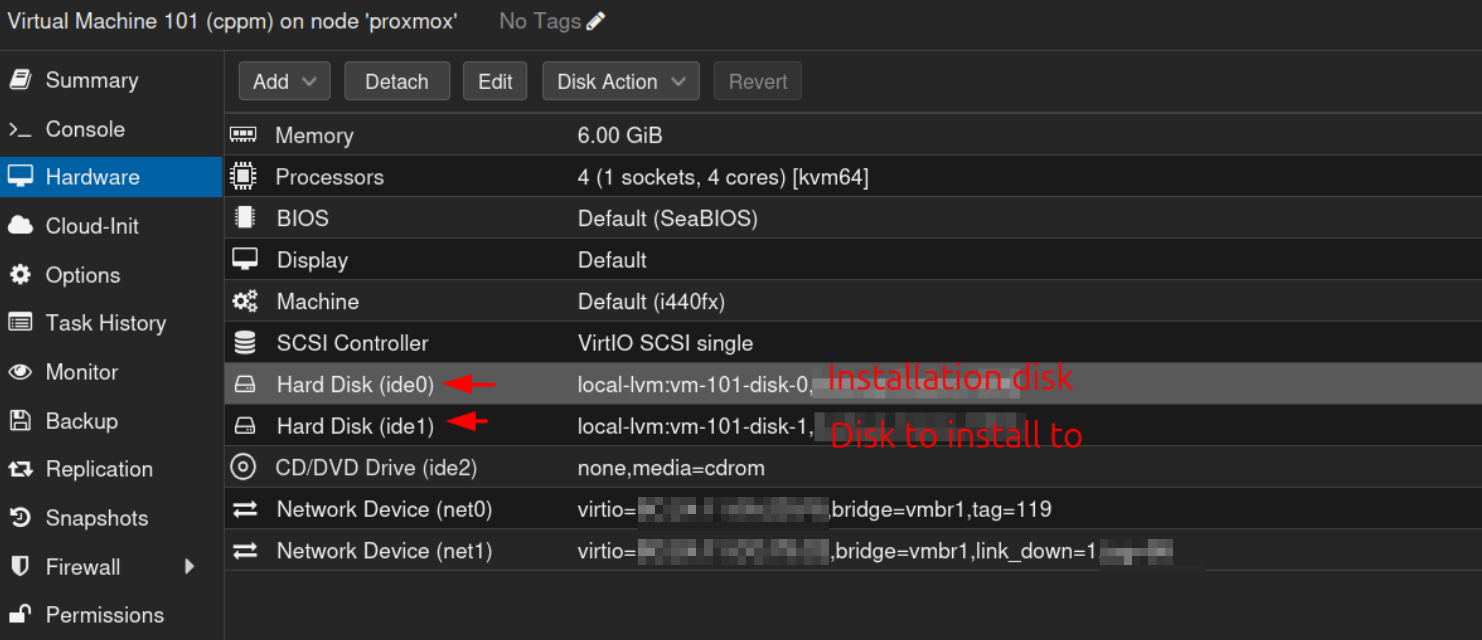
CLABV Specs - good enough for my homelab
CPU: kvm64 - 4 cores
6 GB RAM
ℹ️ Note that the disks must be IDE, otherwise installation will not detect the disk.
disk-id0: ide0 40 GB - Installation / boot-disk
disk-id1: ide1 160 GB - datadisk
Two network interfaces are required, I usually only connect one of them. I use
net0 with vlan tag 119 below, note that net1 is disconnected.
Upload CPPM raw image to replace disk0
CPPM for KVM is a raw disk that boots Clearpass. You will need to upload the
diskimage to proxmox and replace the disk0 you created in the previous step.
Proxmox creates a symlink in /dev/pve for each VM disk. This symlink points
to /dev/some-disk-filename.
For example for my vm with id 101:
root@proxmox-server:/dev/pve# ls -lahg
total 0
drwxr-xr-x  2 root  120 Jan  5 08:55 .
drwxr-xr-x 20 root 4.7K Jan  5 08:55 ..
lrwxrwxrwx  1 root    7 Jan  2 14:10 root -> ../dm-1
lrwxrwxrwx  1 root    7 Jan  2 14:10 swap -> ../dm-0
lrwxrwxrwx  1 root    7 Jan  5 08:50 vm-101-disk-0 -> ../dm-6
lrwxrwxrwx  1 root    7 Jan  5 08:55 vm-101-disk-1 -> ../dm-7
vm-101-disk-0 points to /dev/dm-6.
So I need to upload my diskimage and replace it.
There are different ways to do this. I use the command below:
dd if=CPPM-VM-x86_64-6.11.1.251304-KVM.raw | ssh [email protected] dd of=/dev/dm-6 bs=1M
You can get progress bar with the dd arg: status=progress
When it finishes, you will see output similar to this:
83886080+0 records in
83886080+0 records out
42949672960 bytes (43 GB, 40 GiB) copied, 428.529 s, 100 MB/s
0+1355774 records in
0+1355774 records out
42949672960 bytes (43 GB, 40 GiB) copied, 425.33 s, 101 MB/s
Boot the VM and install Clearpass
Select CLABV on boot. Then just follow the prompts.
Instructions and default password can be found in the user guides.
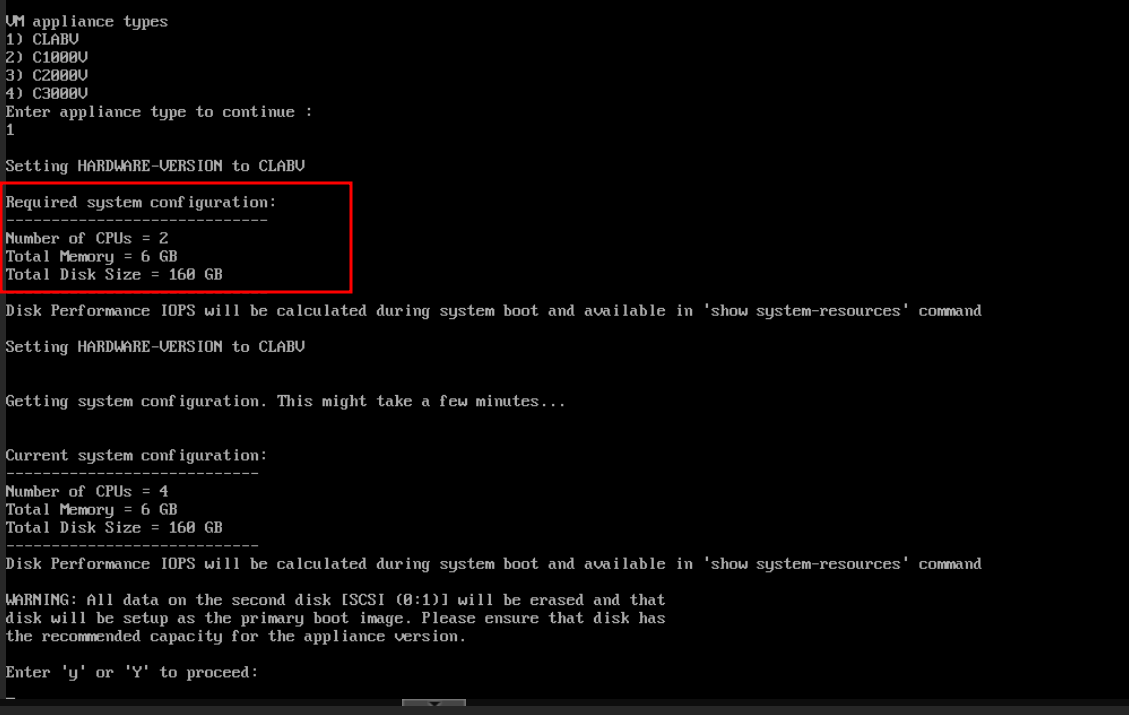 During boot you will also see which eth
mac-adress is used for what id, a good thing to double-check.
During boot you will also see which eth
mac-adress is used for what id, a good thing to double-check.
The installation wizard will prompt for setup options, all are fairly straightforward if you have worked with clearpass in the past. Otherwise just check the docs they have information on the whole process.